
The complete guide
How To Choose And Use An Electric Circuit Motor Kit
The problem with teaching electricity
Electricity is one of the hardest things to teach a child, because there is nothing to watch. Water flows and you can see it. Gears turn and you can follow them. But current is invisible, and the usual lesson ends up being a diagram on a page with arrows that mean nothing yet.
Flat batteries in a drawer and a torch that sometimes works do not help either. A child learns that pressing a button makes light, which is a fact about buttons, not about circuits.
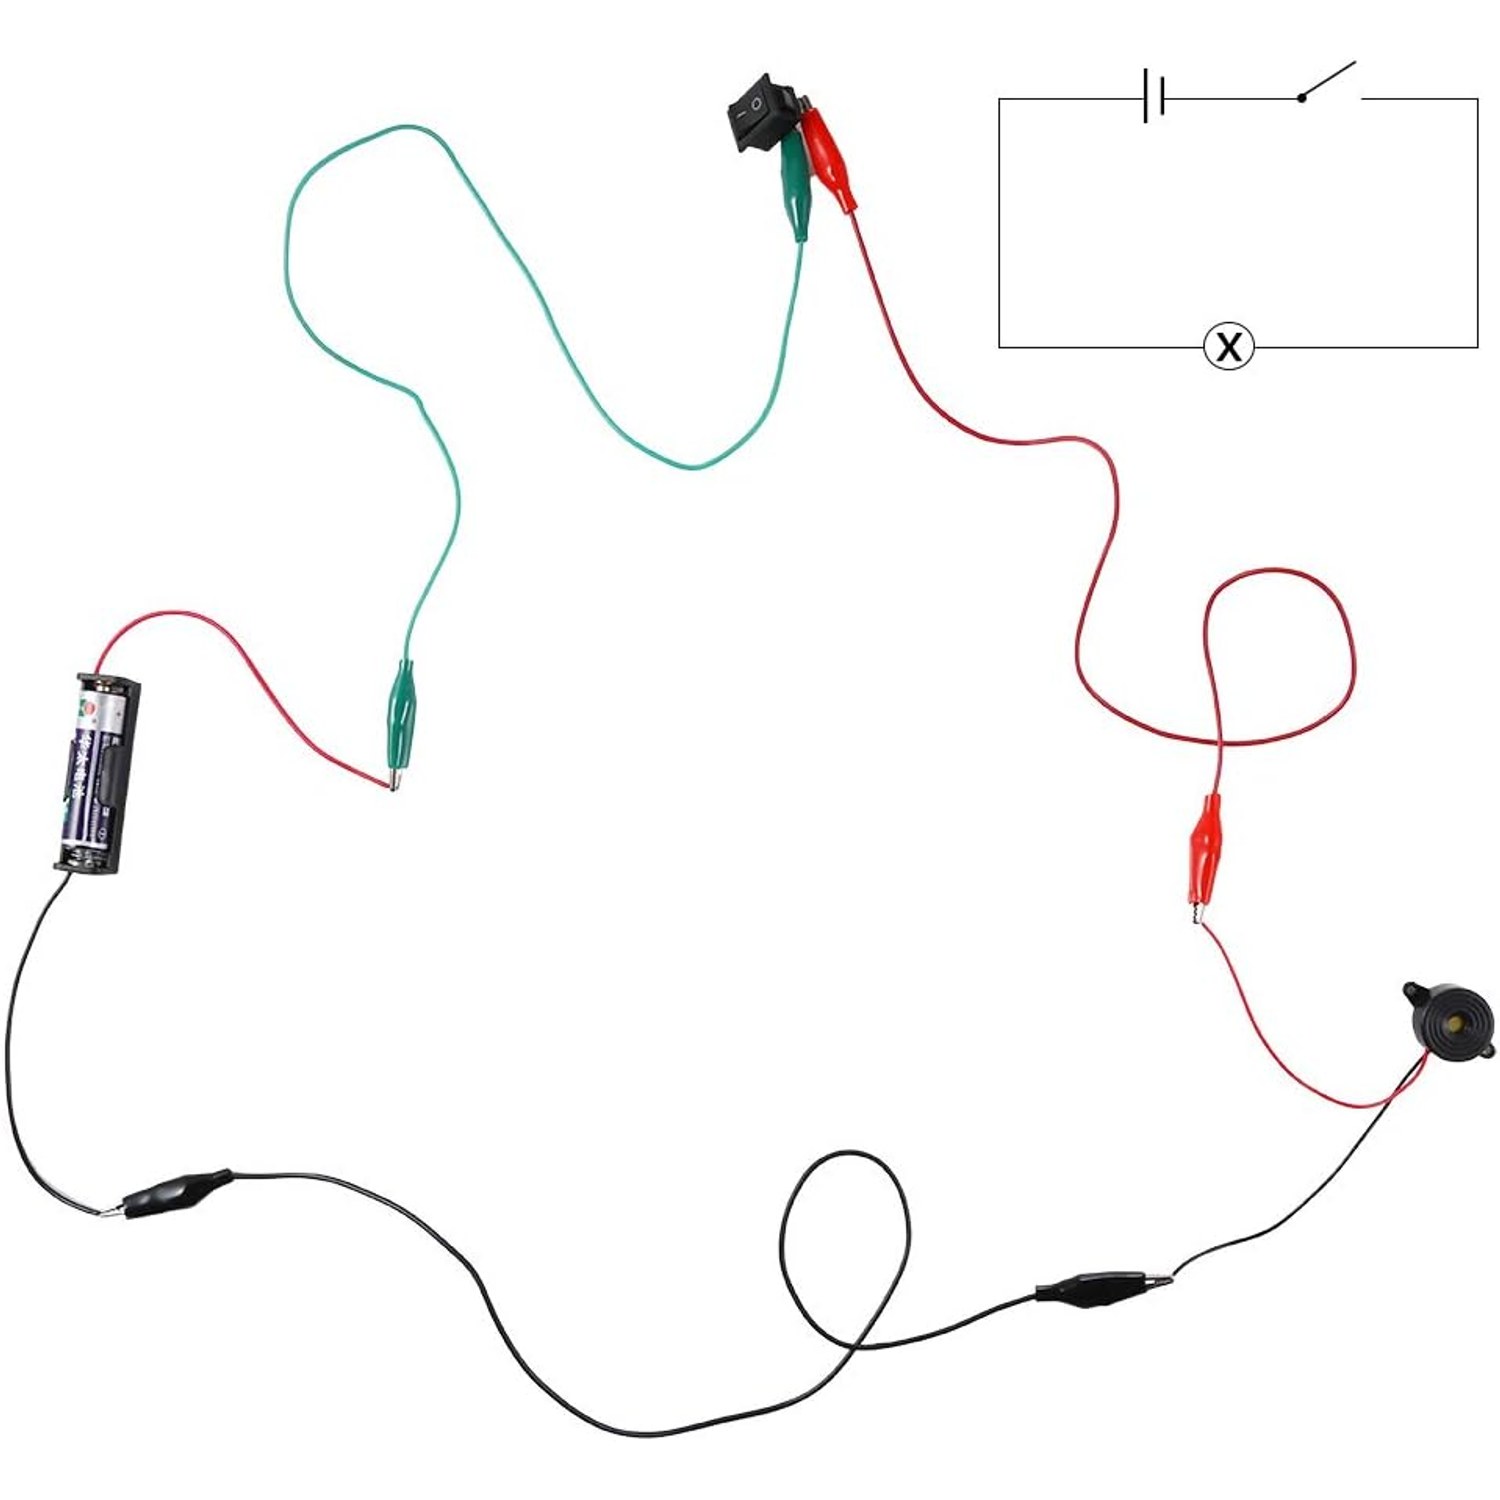
What actually works is letting them build the loop themselves. Clip a wire from a battery, through a switch, into a bulb, and back to the battery. Break the loop anywhere and the light dies. Close it and it comes back. That one experiment, done by hand, teaches more than a term of worksheets.
What this kit gives you
The electric circuit motor kit is a box of loose parts, which is the point. Nothing is pre-wired and nothing is sealed, so every connection is made by the person building it.
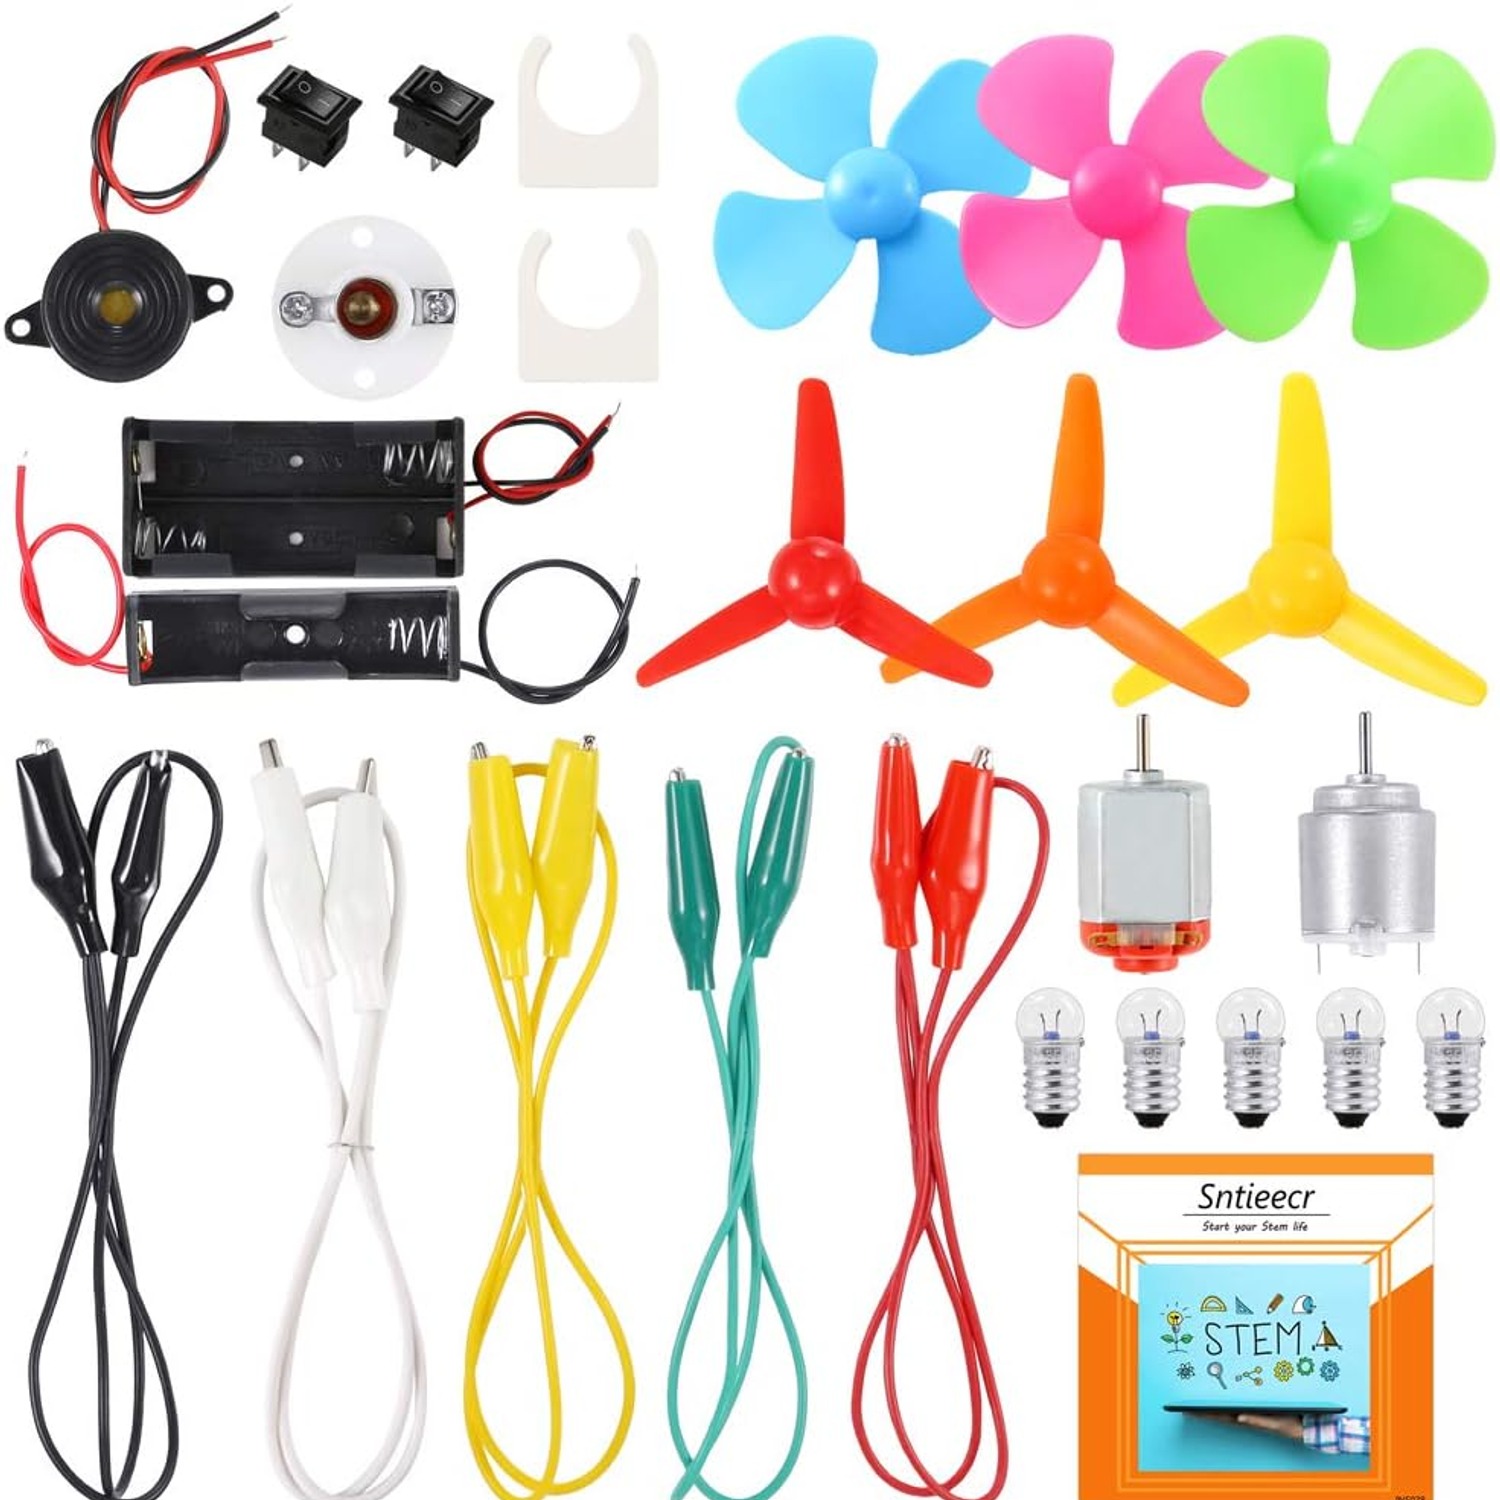
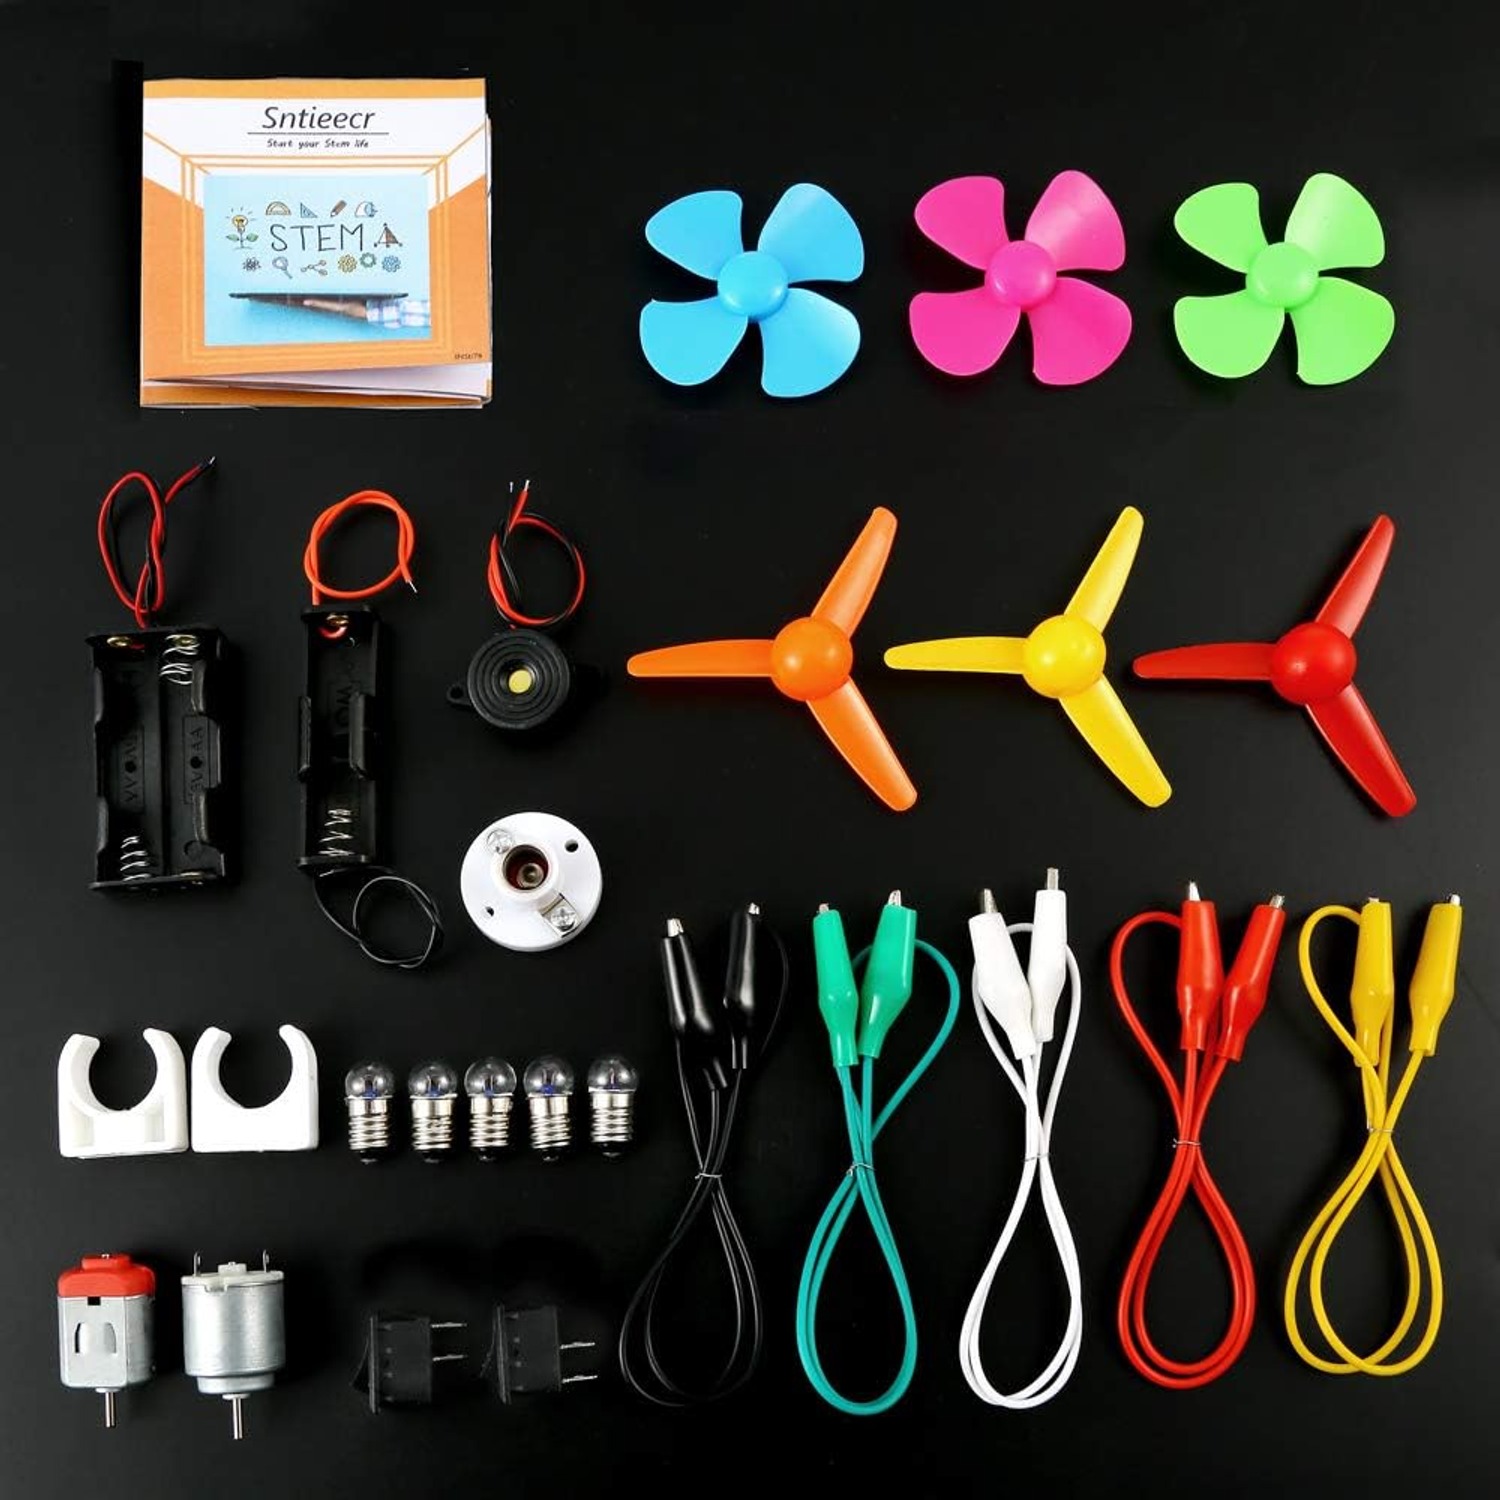
Inside you get five crocodile clip leads, five bulbs, a bulb holder, two motors with two motor holders, two rocker switches, a buzzer sounder, six propellers (three with three vanes and three with four), two AA battery holders and an instruction sheet. One battery holder takes a single 1.5V cell and the other takes two. Batteries are not supplied.
Those two battery holders are more useful than they look. Running the same motor circuit at 1.5V and then at 3V shows, in about ten seconds, that more voltage means more speed. No explanation needed first. The child sees it, then asks why, and that is the right order.
How the parts work together
A circuit needs a source, a path and something to do work. The battery holder is the source, the crocodile leads are the path, and the bulb, buzzer or motor is the work.
Three different outputs is a deliberate choice by the makers. A bulb turns electricity into light. The buzzer turns it into sound. The motor turns it into movement, especially once a propeller is pushed onto the shaft. Same current, three results, and that is a cleaner way to introduce energy transfer than any textbook paragraph.
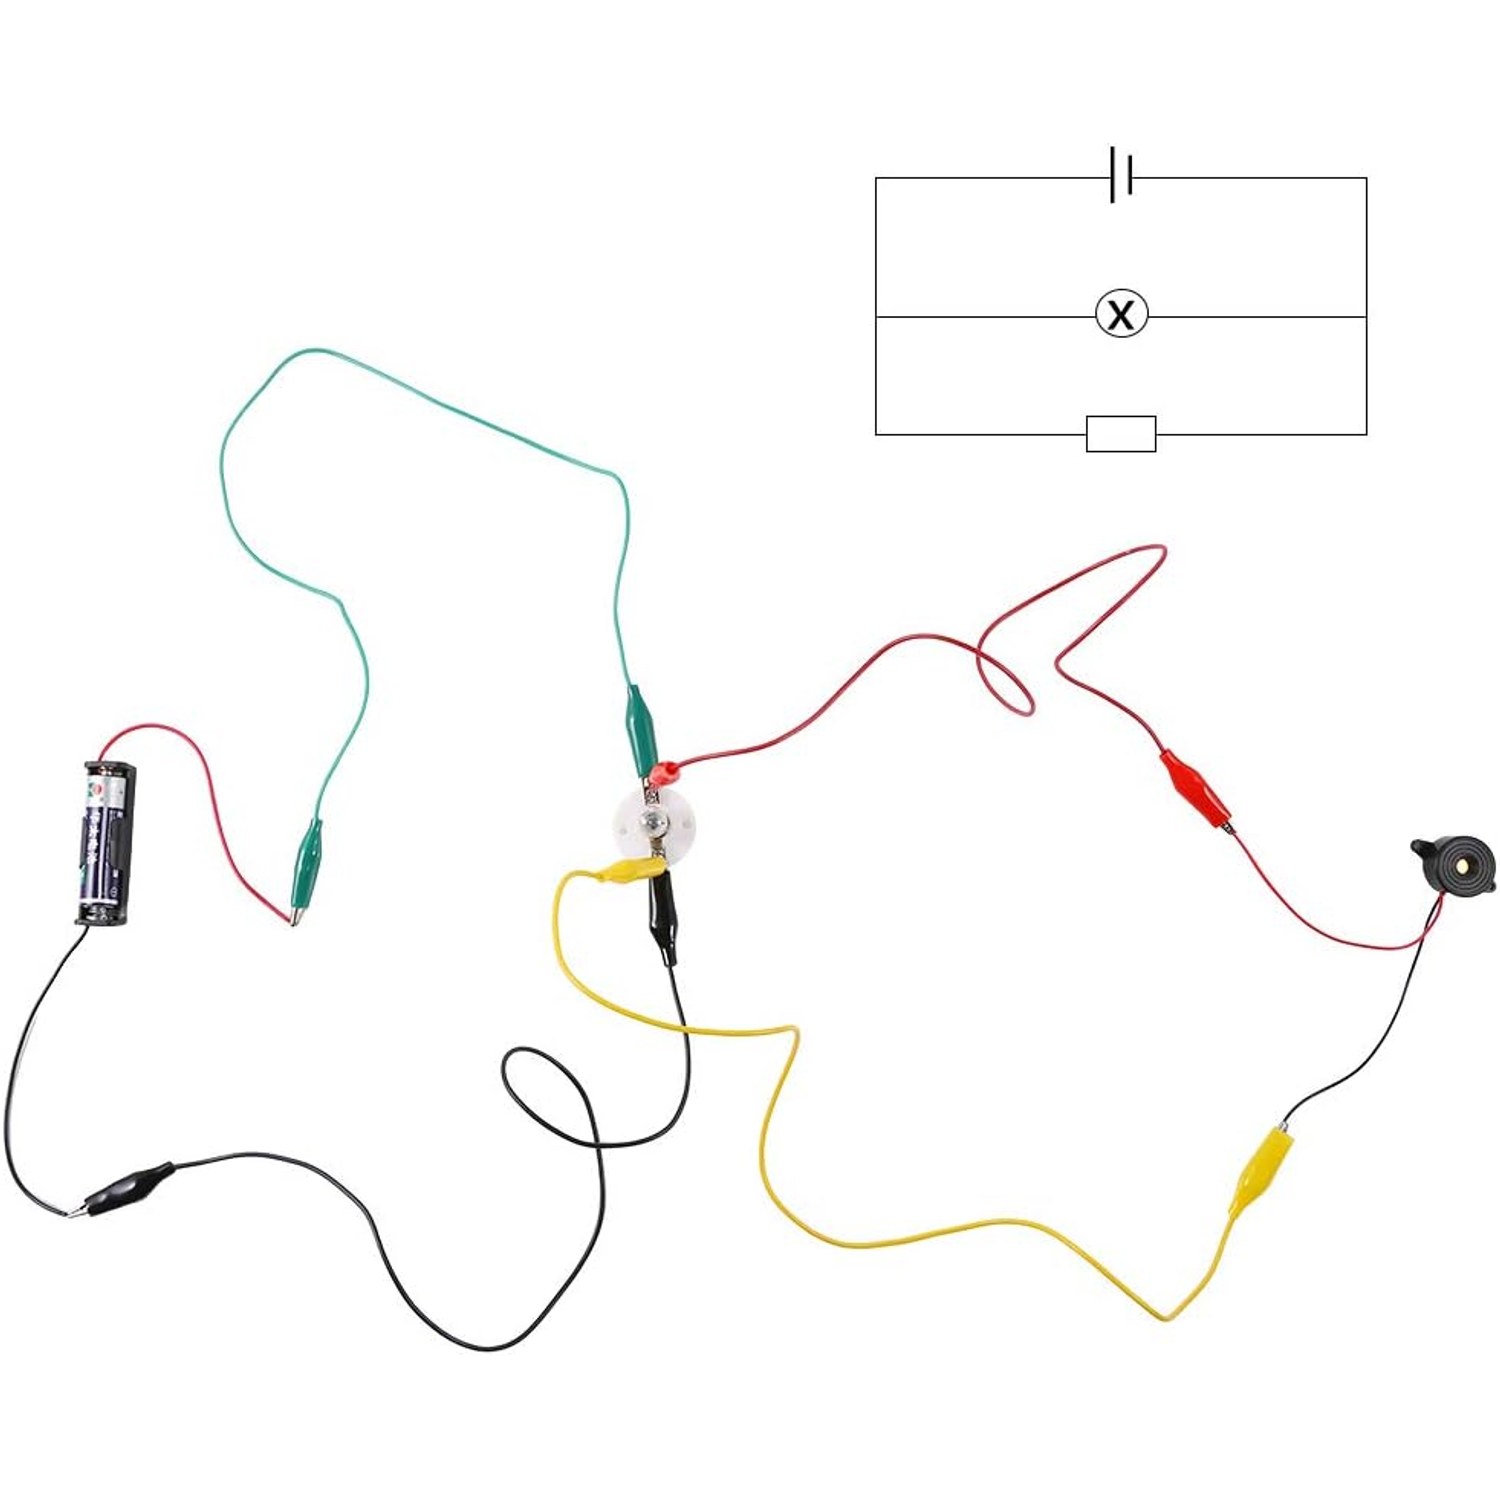
The switches add control. With a rocker switch in the line, a child can open and close the circuit at will, which makes the idea of a break in the path physical rather than theoretical. With two switches and five leads, you can build circuits where one switch controls one branch and the second controls another. That is where parallel wiring starts to make sense, because turning off one branch leaves the other happily running.
Who it suits
The maker recommends ages 8 and up, with an adult supervising. That age fits. Around eight, most children have the finger strength for crocodile clips and the patience to retrace a circuit when it does not work.
It is a good fit for a few different households. Parents of a child who takes things apart will find it keeps them busy without needing a workshop. Homeschooling families get a reusable resource that covers a decent slice of the electricity curriculum. Teachers use kits like this in science, technology and design lessons, where one box supports a small group and resets quickly between classes.
It is less suitable for children under 8 working alone, and it is not for under-3s at all because of the small parts. If you have a child under 3 in the house, build on a table they cannot reach and count the propellers back into the box afterwards.
How to choose between kits
If you are comparing options, a few things matter more than the photo on the front of the box.
Count the leads. Fewer than four and you cannot build anything branching. Five, as here, is enough for a parallel circuit with room to spare.
Look for more than one type of output. A kit with only bulbs teaches one idea. Light, sound and motion in the same box lets a child compare, which is where real understanding starts.
Check whether the voltage can be changed. Two battery holders at different cell counts is a small detail that opens a whole category of experiment. Kits with one fixed supply cannot do that.
Finally, check whether soldering is involved. For a first kit, it should not be. Clips let a child rebuild a circuit twenty times in an hour, and that repetition is where the learning sticks.
Running it safely
There are a few rules worth setting before the first session, and they are quick.
Keep the working voltage between 1.5V and 3V, as the maker advises. If you are running at 3V, keep each run to about three minutes. Longer than that and components start to warm.
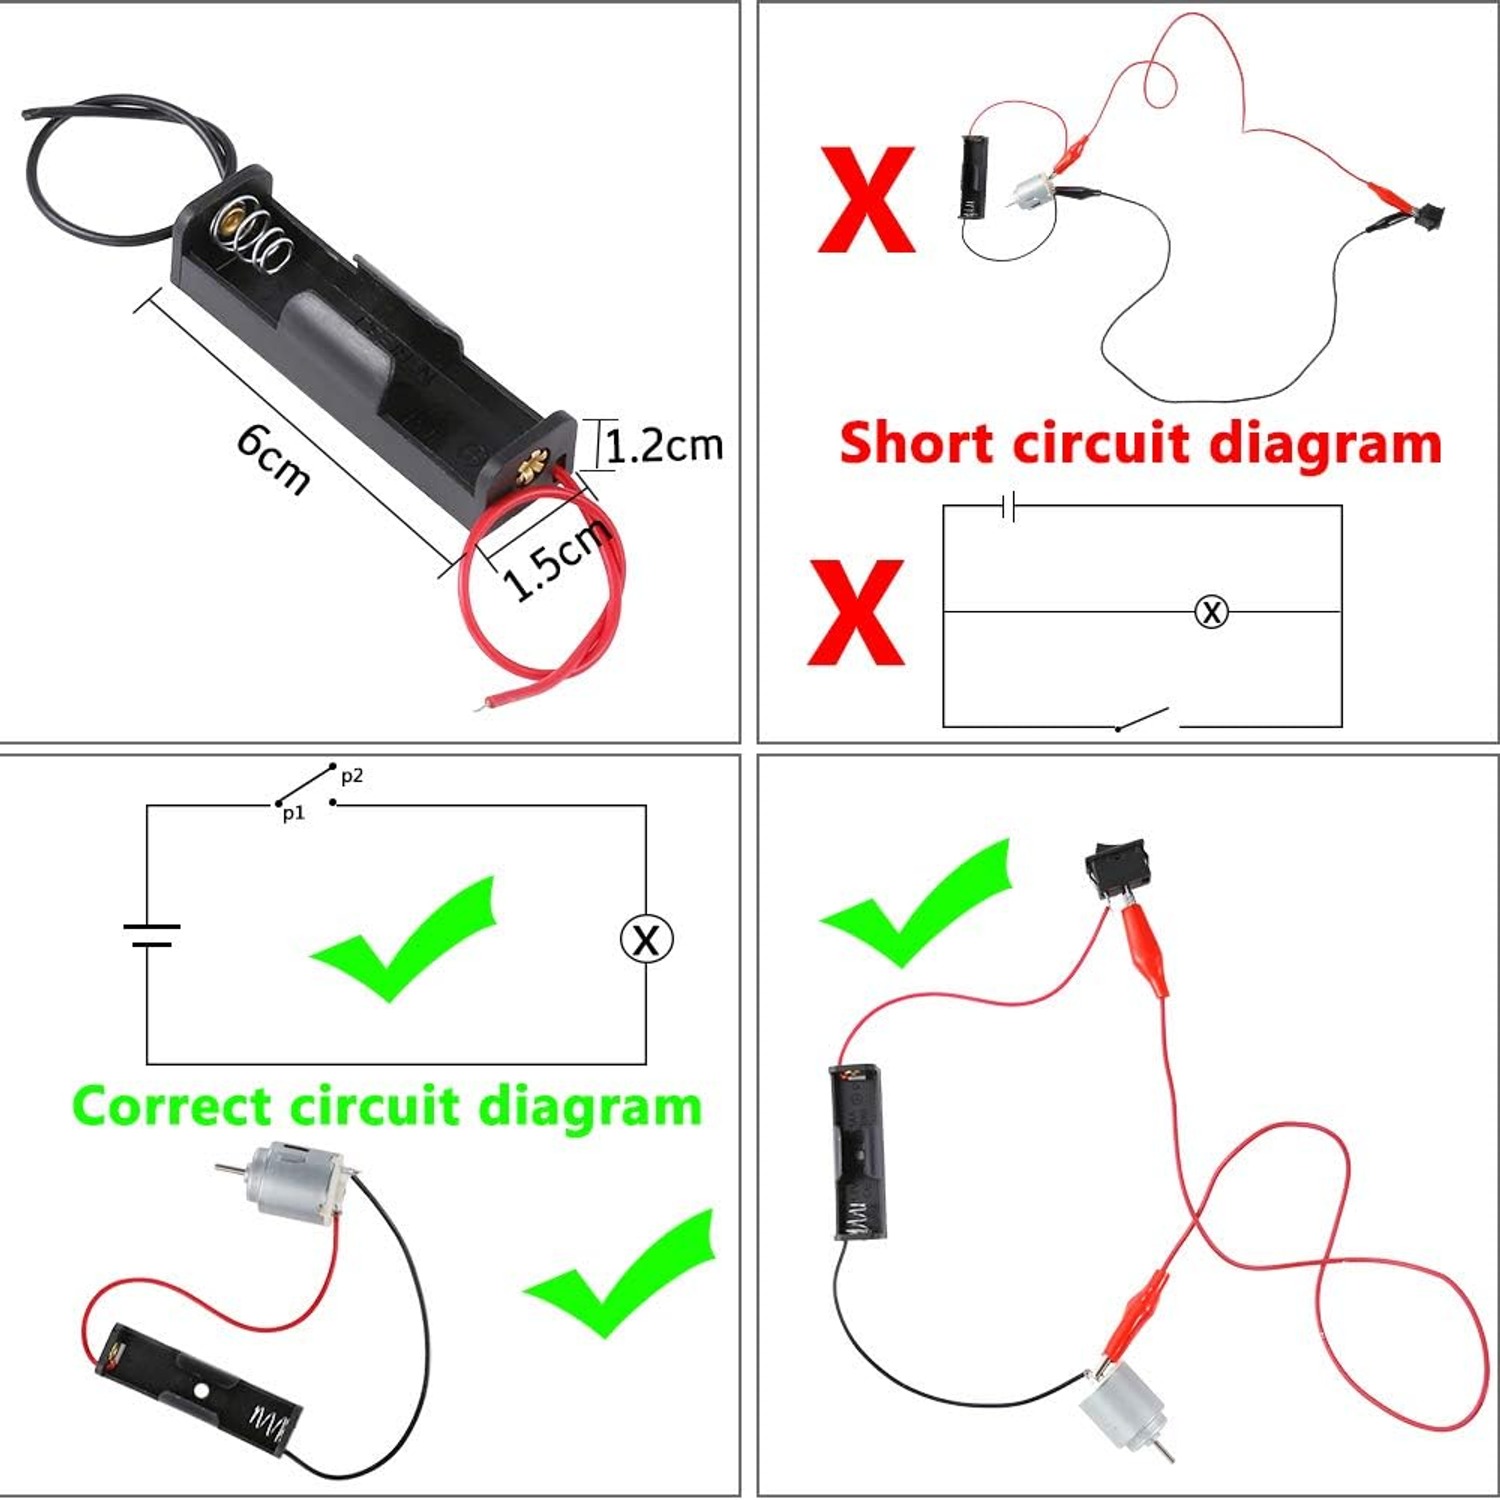
Never connect a lead straight from one battery terminal to the other. There has to be a bulb, buzzer or motor in the path to do the work. Without one, you get a short circuit, heat, and possibly a melted battery holder. This is the single most common mistake, and it is worth demonstrating once, carefully, so the child knows what to avoid.
Do not mix old and new batteries, and do not mix alkaline, carbon-zinc and rechargeable cells in the same holder. Mixed cells behave unpredictably and can get hot.
Read the circuit diagrams on the instruction sheet first. They are there to keep the first few builds on safe ground, and a child who follows them for the first three circuits will have a much better feel for what is allowed by the fourth.
Looking after the kit
This is a kit that survives for years if two habits are kept. First, everything goes back in the box at the end of a session. Propellers and small bulbs are exactly the sort of thing that vanishes under a sofa. Second, the batteries come out when the kit is stored, because cells left in a holder can leak and ruin the contacts.
Wipe plastic parts with a dry cloth if they get dusty. Nothing in the set should be washed or soaked. Before each session, glance at the crocodile clips to check the jaws still grip and the insulation on the leads is intact. A clip that has gone loose will cause a circuit to fail for no visible reason, which is frustrating when you are chasing a real fault.
Spare bulbs are inexpensive and easy to find if one burns out, which usually happens when the voltage was pushed too high or a circuit ran for too long.
Getting the most out of it
Start simple. Battery holder, one lead to a switch, another to the bulb holder, back to the battery. Let the child find the error if the bulb stays dark, rather than fixing it for them. Tracing a dead circuit is the most useful skill in the box.
Then move on to comparisons. Does the motor spin faster on one cell or two? Does a three-vane propeller move more air than a four-vane one? Which is louder, a buzzer at 1.5V or 3V? Each of these is a proper experiment with a measurable answer, and they are far more interesting than following a diagram.
Later, try building two branches with two switches and ask what happens when only one is on. That is parallel wiring, learned by hand.
The short version
This is a loose-parts electric circuit motor kit for ages 8 and up, with five leads, five bulbs, two motors, two switches, a buzzer, six propellers and two battery holders at different voltages. No soldering, no assembly, batteries not included. Keep it between 1.5V and 3V, keep 3V runs short, and have an adult nearby.
What you get for that is a child who understands what a circuit is because they built one, broke it, and fixed it again. That is worth a lot more than a sealed toy that only does one thing.